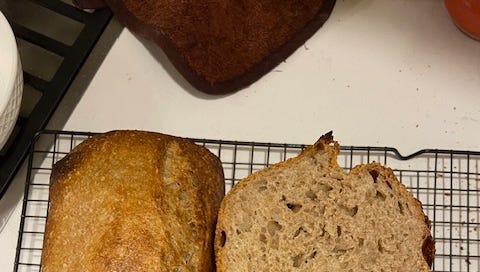
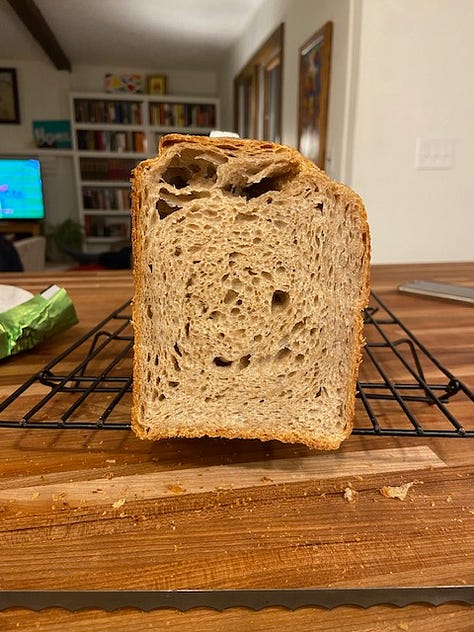
Disclaimer: not an expert. Still very much trying to wrap my head around sourdough. This is how I’m currently making 60% whole wheat sourdough loaves that aren’t as hard as bricks. The ratios and process have evolved since jumping into the journey in July.
I’m writing this for friends who have a working understanding of sourdough. That Sourdough Gal (also on Instagram) has been a helpful resource for my journey. My first recipe was from The School of Lunch, who uses 100% whole wheat.
Mindset
One of the hurdles I conquered with sourdough was mindset. I used to subscribe to the thought that “I can’t be tied to sourdough, my schedule changes too frequently. When am I ever home all day?!”
This summer at The School of Lunch, Hilary and Chuck framed it as “systems.” They make sourdough on the same day of the week, every week - both at home and school. This takes away some of the mental math and consequent guess work of “When will I do this? When will it be time to bake?” etc.
They also taught me a trick: pop the dough in the fridge if needing to pause the process for a bit (hours or overnight) to buy myself time.
Hilary gave the sage advice, “You just have to do it. Spend time making sourdough to learn. Know you will have flops. And you will learn from doing it. Earn your street-cred.” Just do it.
Ingredients
800g warm water
500g freshly milled hard red wheat or spelt or combo
100g whole wheat bread flour (from Azure)
400g unbleached AP flour (organic from Costco)
200g active starter
25g Redmond Real Salt or 28g BajaGold
30g (about 3T butter)
{Edit 2/19/25: last night I used
750g very warm water
800g freshly milled hard read wheat
200g AP flour = temp was 80* after mixing
200 starter, 25 salt, 30 butter}
Tips
Starter - I aim to feed twice before using, esp if I haven’t used the starter in a week or longer. When I started doing this I noticed a difference. It’s possible to make bread with semi-active starter but it will raise better if fed twice, in my experience.
Feeding the starter 1:3:3 peaks at 9hours, stays for 6; 1:5:5 peaks at 10 hours, stays for 7
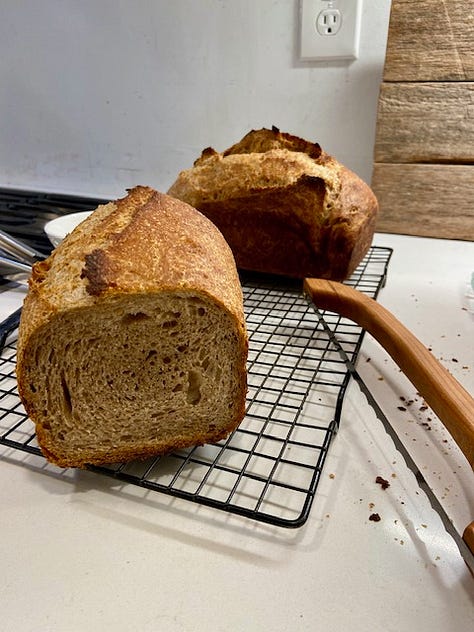

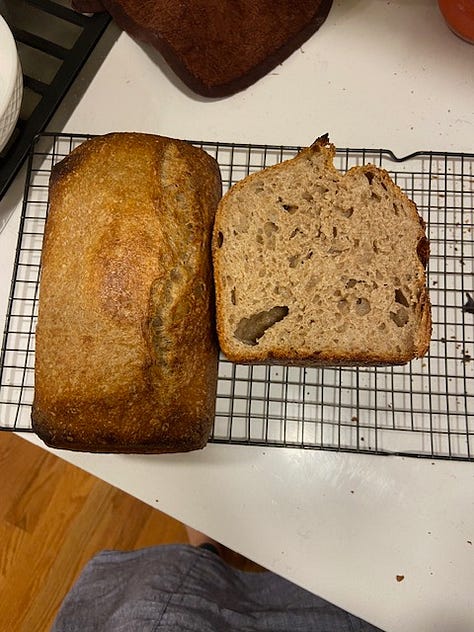
Autolyse is something I stumbled upon and seems to really encourage fluffy whole wheat bread (gluten development? Mix whole wheat flour and water (without starter) very first and let sit 10-45 minutes. If not using whole wheat, you don't need as much water and autolyse isn’t as important.
An autolyse is the gentle mixing of the flour and water in a bread recipe, followed by a 20 to 60 minute rest period. After the rest, the remaining ingredients are added and kneading begins. This simple pause allows for some rather magical changes to occur in your bread dough. - from King Arthur website
My encouragement is to focus on mastering one recipe with a single grain before branching out and getting all crazy with variables. I made the mistake of trying kamut (ancient grain) before hard red wheat. Kamut is lower in gluten so I thought it would be better for my gluten-sensitive husband. Lower gluten makes denser bread, too. Turns out that he is able to tolerate organic sourdough without tummy problems. I’ve also experimented with spelt.
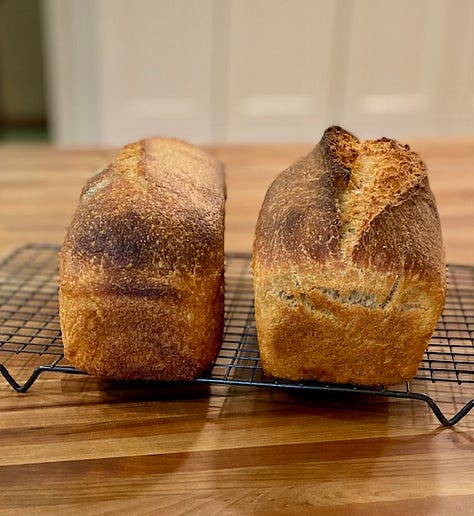
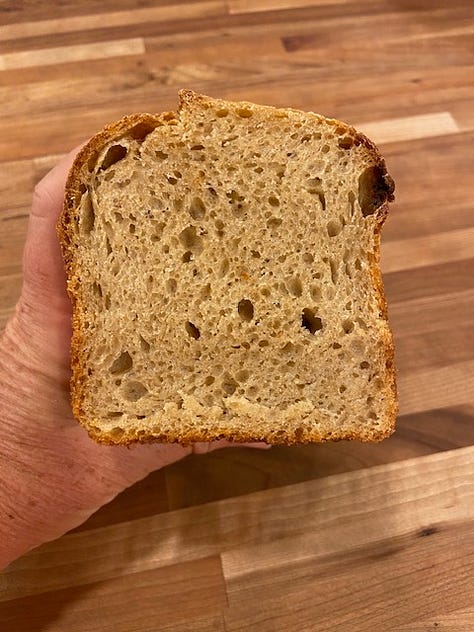
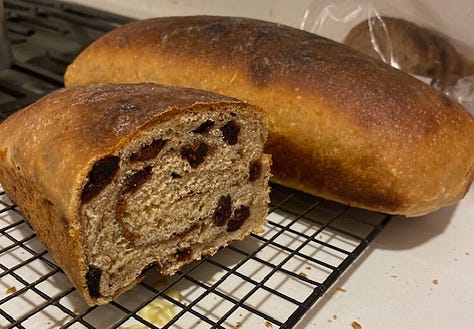
Use the refrigerator to keep from being tied to the kitchen. Cold fridge slows fermentation. Particularly, I use the fridge for the bulk ferment as well as proofing in loaf pans. If I can time it right, my best loaves are when I stretch/fold/ bulk ferment on counter and proof in loaf pans overnight (8-24 hours) in fridge. If I had to run out in the midst of stretch and folds, I would pop the bowl in the fridge then pick up where I left off once home.
Set timers for stretch and folds. I make a post-it note with two columns: predicted and actual. So at the end of the 4 stretch and folds I see what times I actually stretched it. Just the nerd in me. Often if I’m running errands my daughter will do the stretch and folds.
I use a plate on top of my bowl as a cover.
Process
I start with very warm, almost hot water now that my house is cooling down (it’s November as I write.) Add wheat flour to autolyse and putter around kitchen for 10-45 minutes. Gradually add AP flour then starter very last, after all other flour(s).
Sprinkle salt and pats of butter on top of dough. Wait about 30 minutes then pinch it in.
Start the timer for stretch and folds.
I’m still learning the best way to shape loaves.
Example Timeline
Saturday 8-9pm feed starter 1:5:5
Sunday 7-9am feed starter 1:3:3 or 1:5:5
Sunday afternoon 5pm autolyse: water and whole wheat
5:30 mix in AP then starter, salt and butter on top
6p pinch in salt and butter + stretch and fold
6:30 first stretch and fold
7p 2nd stretch and fold
7:30p 3rd stretch and fold
8pm 4th stretch and fold
8-10pm bulk ferment on counter
10p shape loaves and pop in fridge to bake Monday
or 8p pop into fridge to bulk ferment, covered
Monday (if fridge bulk ferment) shape loaves and pop in oven as soon as oven is hot; this depends somewhat on how long it was in the fridge.
Baking
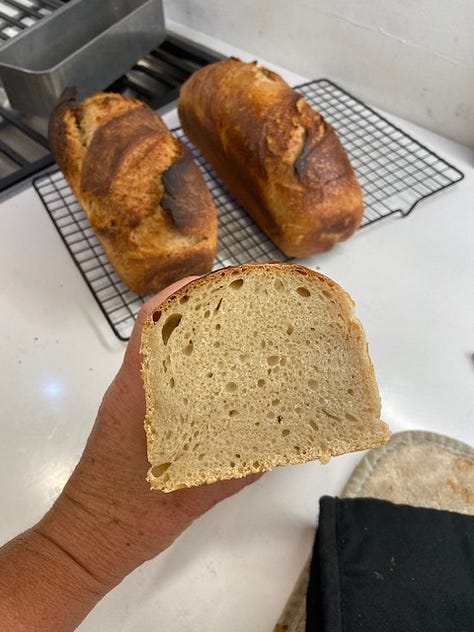
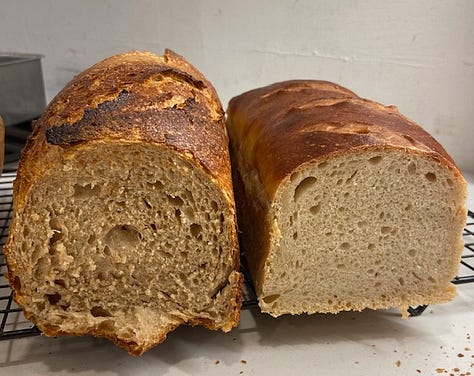
I use USA pans I found used at a restaurant store (Dine, in Louisville). I use butter to grease the pan and one on top to create a dome for the first 30 minutes in the oven…like some people use a dutch oven for boules. I’m still learning to shape the bread and feel like bread pans just work the best for me — and my kids prefer the shape of this loaf.
Preheat oven to 500. After inserting bread, drop temp to 450. Bake 30 minutes, remove lid. Tent with foil so crust doesn’t burn. Drop temp to 425 for additional 25-30 minutes. I use a digital thermometer to insure 200* finished temp so it’s not gooey inside. If I were baking boules in a dutch oven, I would keep the temp at 500 for 30 min then drop to 450 for last 30 min.
A friend uses these inexpensive 6” deep steam pans for baking boules. It’s genius because she’s dedicating a vessel for baking bread. I hate scrubbing the dutch ovens (I have both stainless steel and LeCreuset) after making bread. When using the steam pans, you can not worry about their appearance.
Tools That Help
digital scale (I use it daily!) $8 from Amazon
Danish dough whisk, stainless so it can go in dishwasher
stainless bowl
beeswax covered cloth wraps to keep loaves fresh - bought mine from Amazon but it’s cheaper from Azure. I love these more than expected.
digital instant read thermometer (aim for ~200*F for done)
Norwex netted dish cloths - incredible for removing dough from bowls and countertops.
bow knife allows you to cut hot bread without smooshing it. I found one on etsy. They’re also on Amazon.
I score with a knife and would love lame recommendations if you have one you love.
Life is hard; food doesn’t have to be.
Julie
PS - Chef Aran, a teacher at The School of Lunch, has an incredible video course on sale (no commission, just love Chef Aran’s work). Would be a fun Christmas gift for yourself or a child wanting to get in the kitchen.

